Self-Service Single Sign-On
Self-Service Single Sign-On (SSO) provides business-to-business (B2B) customers with the tools needed to delegate SSO setup to their enterprise customers. By delegating this task, you can streamline your onboarding process and grant customers more autonomy over their sign-on experience. You can also reduce the time and costs associated with managing SSO across your customer base.
Self-Service SSO requires minimal configuration in your Auth0 tenant and provides your customers with a setup assistant that guides them through the enablement process. After a customer completes their setup, the SSO integration is automatically added to your tenant as an Enterprise connection.
Supported Providers
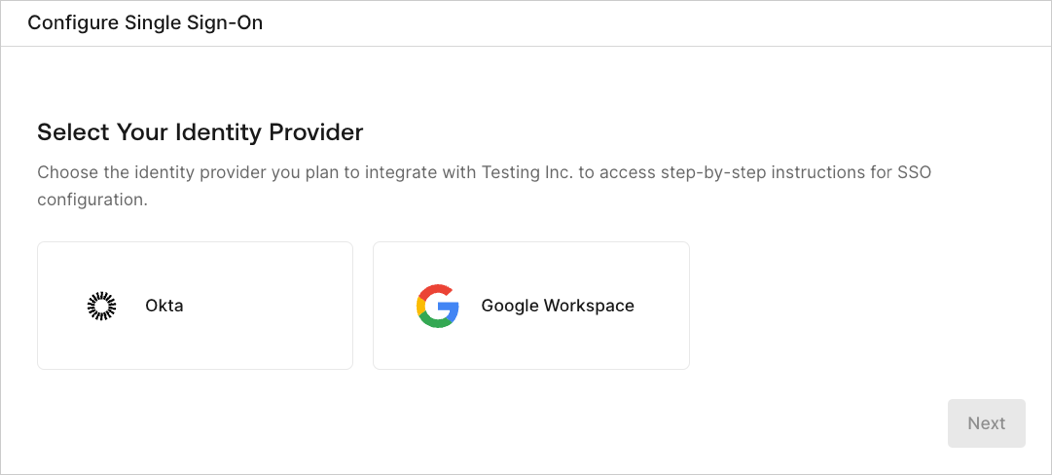
Self-Service SSO currently supports the following identity providers:
Okta Workforce Identity Cloud (using OIDC)
Entra ID
Google Workspace (using OIDC)
Keycloak
Microsoft Active Directory Federation Services (ADFS)
PingFederate
Generic OIDC
Generic SAML
How it works
Self-Service SSO uses the following components to delegate setup to your customers:
Self-service profile: Defines key elements of customer SSO implementations, such as the identity providers they can use for SSO and which user attributes they must capture, such as email.
Self-service access ticket: Grants customer admins access to the SSO setup assistant and sets specific details for their resulting SSO integration.
SSO setup assistant: Guides customer admins through the SSO setup process.
At a high level, the Self-Service SSO workflow includes the following tasks:
You (the Auth0 customer) create a self-service profile in your tenant using the Auth0 Dashboard or the Management API.
Using the Management API, you next create a self-service access ticket that allows customer admins to configure SSO.
You retrieve the ticket URL from the asset created in Step 2 and send this link to your customer admin.
Your customer admin launches the SSO setup assistant and follows the steps provided to create an application with their identity provider.
A new Enterprise connection pointing to the customer’s application is added to your Auth0 tenant.
Select the diagram for an expanded view.
Using Self-Service SSO
The sections below provide expanded steps for configuring a self-service profile and generating self-service access tickets to share with customer admins.
Create a self-service profile
You can create self-service profiles using the Auth0 Dashboard or the Management API. Self-service profiles are used to determine key elements of customer implementations, including:
Which identity providers customer admins can use for SSO.
Which user attributes they must capture through SSO, such as email or family name.
Branding options that customize the look and feel of the SSO setup assistant.
You can create multiple profiles as needed to accommodate different customers or segments.
To create a self-service profile on the Auth0 Dashboard:
Navigate to Authentication > Enterprise and open the Self-Service SSO section. Then, select Create Profile.
In the space provided, enter a name and optional description for the profile. Then, select Create.
On the Settings tab, complete the sections below. After updating these sections, select Save.
Identity Providers: Enable one or more identity providers. In the SSO setup assistant, customer admins can select their preferred option from the list of enabled providers.
Branding: Provide a logo and primary color for the SSO setup assistant.
Custom Introduction: Modify or replace the default message as needed. This introduction text displays to customer admins on the landing page of the SSO setup assistant. Your messaging can include basic formatting options, such as bolding or hyperlinks, and is limited to 2000 characters.
On the User Profile tab, add up to 20 user attributes that your customers should capture through SSO, such as email or family name. You can set each attribute as
required
oroptional
.During the setup assistant flow, customer admins will be prompted to map these defined user attributes to their identity provider to ensure the necessary values are passed to Auth0.
To create a self-service profile, first call the Self-Service Profiles endpoint to create the profile. Then, use a PUT call to optionally modify its introduction text.
Create a self-service profile:
Make a POST call to the Self-Service Profiles endpoint.
Specify the following parameters in the request body, as needed:
Parameter | Description |
---|---|
name |
String. Maximum length is 100. A user-friendly name for the self-service profile. This parameter is required. |
description |
String. Maximum length is 140. A description of the service profile. This parameter is optional. |
allowed_strategies |
Array. One or more identity providers that customer admins can use to implement SSO. Options include:
|
user_attributes |
Object. Maximum length is 20. Stores mapping information presented to customer admins during the setup assistant flow. Customer admins are prompted to map these attributes to their identity provider to ensure the specified attributes are passed to Auth0. This parameter is optional. |
user_attributes[].name |
String. Maximum length is 255. Name of the user attribute in Auth0. This parameter is required when defining user_attributes . |
user_attributes[].description |
String. Maximum length is 255. Human-readable description of the user attribute. This parameter is required when defining user_attributes . |
user_attributes[].is_optional |
Boolean. Indicates whether an attribute is optional or required by the customer in order for the application to function.
This parameter is required when defining user_attributes . |
branding |
Object. Used to customize the styling of the SSO setup assistant presented to customer admins. This parameter is optional. |
branding.logo_url |
String. Maximum length is 1024. An HTTPS URL that points to a logo. If provided, this logo displays to the top right of the SSO setup assistant. This parameter is optional. |
branding.colors |
Object. Allows you to set a primary color for certain elements of the SSO setup assistant, such as interactive buttons. This parameter is optional. |
branding.colors.primary |
String. Specifies the hex value of the primary color used for the SSO setup assistant. This parameter is required when defining branding.colors . |
Example Request Body
{
"name": "Example Profile",
"description": "An example profile for all customers",
"allowed_strategies": ["okta","adfs","google-apps"],
"user_attributes": [
{
"name": "email",
"description": "User's email",
"is_optional": false,
}
],
"branding": {
"logo_url": "https://example.com/logo.png",
"colors": {
"primary": "#334455"
}
}
}
Was this helpful?
Customize your introduction text
When a customer admin accesses the SSO setup assistant, they first land on an introduction page that welcomes them to the experience. By default, the following message is provided:
"You are a few simple steps away from setting up SSO. This setup process involves making some changes to your identity provider. Before you begin, open your identity provider in a separate browser tab or window."
You can modify this text by making a PUT call to the Custom Text for Self-Service Profiles endpoint.
Call
PUT /api/v2/self-service-profiles/{id}/custom-text/{language}/{page}
, whereid
is the profile ID of the self-service profilelanguage
is set toen
page
is set toget-started
In the request body, specify the following:
Property Description introduction
String. Maximum length is 2000.
Complete introduction text to display on the landing page of the SSO setup assistant. Text can include basic formatting options, such as bolding or hyperlinks.
Custom text provided through this parameter completely overwrites any previous messaging. For best results, ensure you provide the full message you wish to display to customer admins.
Sending an empty body{}
resets any customized messaging to the default text.In response, the created entity is returned.
Example Call
PUT /api/v2/self-service-profiles/ssp_1234567890/custom-text/en/get-started
{
introduction: "Welcome! With <b>only a few steps</b>, you'll be able to setup your new connection. For assistance, contact <a href="https://www.examplesupportsite.com"> our support team </a>."
}
Was this helpful?
Example Response
{
introduction: "Welcome! With <b>only a few steps</b>, you'll be able to setup your new connection. For assistance, contact <a href="https://www.examplesupportsite.com"> our support team </a>."
}
Was this helpful?
Manage self-service access tickets
After creating at least one self-service profile, you can generate self-service access tickets using the Management API. Self-service access tickets serve two primary purposes:
Granting customer admins access to the SSO setup assistant, through which they can configure a new SSO connection or modify an existing connection.
Predefining key details and behaviors of new SSO connections your customer admins will configure, such as which applications or organizations will be enabled for the new connection.
Generate an access ticket
To generate a self-service access ticket:
Retrieve the ID of the self-service profile you want to associate with the access ticket through the Retrieve Self-Service Profiles endpoint.
Call the SSO Access Ticket endpoint using the ID of the appropriate self-service profile:
POST /api/v2/self-service-profiles/{id}/sso-ticket
In the request body, specify the parameters described in the table below.
Parameter | Description |
---|---|
connection_id |
String. Provide this option when generating an access ticket for updating an existing SSO connection. ID for the connection a customer admin will update through the SSO setup assistant. Customer admins can modify the SAML certificate or the OIDC ID or secret for the associated connection. Connection IDs can be retrieved through the Authentication section of the Auth0 Dashboard or the Get All Connections endpoint. connection_id cannot be used in tandem with connection_config . |
connection_config |
Object. Provide this option when generating an access ticket for creating a new SSO connection. Customer admins will be able to modify key elements of the connection, such as the SAML certificate or OIDC ID or secret. connection_config cannot be used in tandem with connection_id . |
connection_config.name |
String. Maximum length is 128. Name for the connection created through the SSO setup assistant. This parameter is required when using connection_config . |
connection_config.display_name |
String. Maximum length is 128. User-friendly name for the connection created through the SSO setup assistant. This name displays on Universal Login prompts. This parameter is optional when using connection_config . |
connection_config.is_domain_connection |
Boolean. Set to true if the connection is at the domain level.This parameter is optional when using connection_config . |
connection_config.show_as_button |
Boolean. When true , the connection displays as an authentication option on your application's login screen. This parameter is optional when using connection_config . |
connection_config.metadata |
Object[]. Metadata associated with the resulting connection. Object can contain up to 10 key-value pairs. String values limited to 255 characters. This parameter is optional when using connection_config . |
connection_config.options |
Object[]. Options for the resulting connection, including icon_url and domain_aliases[] .This parameter is optional when using connection_config . |
enabled_clients |
String[]. A list of application client IDs to associate with the SSO connection. |
enabled_organizations |
Object[]. A list of organizations to associate with the SSO connection. |
enabled_organizations[].organization_id |
ID of a specific organization to associate with the SSO connection. You can retrieve IDs through the Organizations section of the Auth0 Dashboard, the Get Organizations endpoint, or the Get Organization by Name endpoint. This parameter is required when using enabled_organizations . |
enabled_organizations[].assign_membership_on_login |
Boolean. When true , users who log in with the associated connection are automatically granted membership to the specified organization.This parameter is optional when using enabled_organizations . |
enabled_organizations[].show_as_button |
Boolean. When true , the associated connection displays as an authentication option on the Organization login screen for your application. This can only be enabled for Enterprise connections.This parameter is optional when using enabled_organizations . |
ttl_sec |
Number. Number of seconds for which the access ticket remains valid before expiration. If unspecified or set to 0 , the value defaults to 432000 (which equals 5 days). |
Example Request Body
{
"connection_config": {
"name": "string",
"display_name": "string",
"is_domain_connection": true,
"show_as_button": true,
"metadata": {
"key1": "value1",
"key2": "value2"
},
"options": {
"icon_url": "string",
"domain_aliases": [
"acme.corp",
"okta.com"
]
}
},
"enabled_clients": [
"string"
],
"enabled_organizations": [
{
"organization_id": "string",
"assign_membership_on_login": true,
"show_as_button": true
}
],
"ttl_sec": 0
}
Was this helpful?
In response, you receive a URL to the self-service access ticket:
{
"ticket": "https://{domain}/self-service/connections-flow?ticket={id}"
}
Was this helpful?
After you receive the ticket URL, share the link with your customer admin to grant them access to the SSO setup assistant. The setup assistant will then guide them through configuring the SSO connection.
You can wrap access ticket generation in your own self-service portal or send ticket URLs directly to customer admins through email, chat, or other communication channels.
Revoke an access ticket
By default, an access ticket URL remains valid for five days. Upon accessing the URL, a customer admin has five hours to complete their setup. If needed, you can revoke an access ticket prior to its expiration. For example, if an access ticket is shared with the wrong audience, you can revoke the ticket to prevent unauthorized access to the SSO setup assistant.
When an access ticket is revoked, its URL immediately becomes invalid, and any associated sessions are terminated. Customer admins with the URL will no longer be able to access the SSO setup assistant. A new access ticket can then be generated and shared as needed.
To revoke an access ticket:
Retrieve the ID of the self-service profile associated with the access ticket using the Retrieve Self-Service Profiles endpoint.
Locate the ID of the access ticket you wish to revoke. IDs can be found at the end of the access ticket URL.
Call the Revoke SSO Access Ticket endpoint using the appropriate IDs:
POST /api/v2/self-service-profiles/{id}/sso-ticket/{id}/revoke
In response, a 202 Accepted
is returned.
References
APIs
To manage Self-Service SSO, the following Management API endpoints are available:
Rate Limits
When using Self-Service SSO, the following rate limits apply:
Description | Endpoint | Limits |
---|---|---|
Manage SSO profiles | /api/v2/self-service-profiles |
Review the Management API rate limits for your subscription type. |
Create an access ticket | /api/v2/self-service-profiles/{id}/sso-ticket |
Review the Management API rate limits for your subscription type. |
Consume an access ticket | /self-service/connection-flows?ticket={id} |
6 / min / IP |
Load the webapp (including setup assistant) and webapp endpoints | /self-service/* |
50 / min / IP 90 / min / tenant |